[ login.html ]
<!-- 가입하기 -->
<!DOCTYPE html>
<html xmlns:th="http://www.thymeleaf.org">
<head th:replace="/fragments/head :: home-customer"></head>
<body>
<nav th:replace="/fragments/nav :: nav-customer"></nav>
<main class="container-fluid mt-5"> <!-- fluid는 가로 해상도에 상관없이 100%의 width-->
<div class="row">
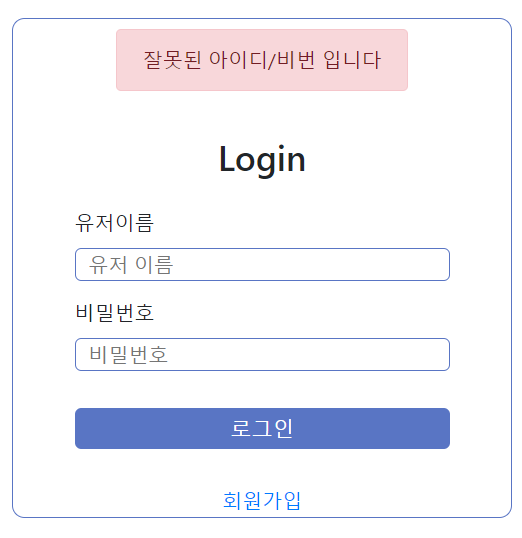
<form style="height:400px" method="post" th:action="@{/login}">
<div style="color: red;" th:if="${param.error}">유저이름이나 패스워드가 틀립니다.</div>
<h3 id="title" style="margin: 20px;">Login</h3>
<label for="">유저이름</label>
<input class="input-field" type="text" name="username" id="username" placeholder="유저 이름" autofocus>
<label for="">비밀번호</label>
<input class="input-field" type="password" name="password" id="password" placeholder="비밀번호">
<button>로그인</button>
<div>
<a th:href="@{/register}">회원가입</a>
</div>
</form>
</div>
</main>
<footer th:replace="/fragments/footer :: footer"></footer>
</body>
</html>
<span class="error" th:if="${#fields.hasErrors('username')}" th:errors="*{username}"></span>
유효성 검사 안 쓰는 이유?
[ UserDetailsServiceImpl ]
@Service
public class UserDetailsServiceImpl implements UserDetailsService{

	@Autowired
	private UserRepository userRepo;

	@Autowired
	private AdminRepository adminRepo;

	@Override
	public UserDetails loadUserByUsername(String username) throws UsernameNotFoundException {
		// 유저DB에서 필요한 유저,관리자 정보를 읽어온다. (입력파라메터는 username)

		User user = userRepo.findByUsername(username);
		Admin admin = adminRepo.findByUsername(username);

		if(admin != null) return admin; // 먼저! 관리자가 있으면 관리자로 리턴
		if(user != null) return user;	// 유저가 있으면 유저로 리턴

		//관리자 유저 모두 없으면
		throw new UsernameNotFoundException("유저 " + username + "이 없습니다.");

	}
}
유효성 검사 대신 만들어놨다
☆ 태그안에 name , id 만 있으면 된다
throw new UsernameNotFoundException("유저 " + username + "이 없습니다.");
#
관리자 유저 없을때 어떻게 나타나지..
<div class="alert alert-danger mt-2" th:if="${param.error}">잘못된 아이디/비번 입니다</div>
[ SecurityConfig ]
@Override
protected void configure(HttpSecurity http) throws Exception {
    // 허가(role에 따른 허용가능한 범위)
    http.authorizeHttpRequests()
        .antMatchers("/category/**").hasAnyRole("USER","ADMIN") //카테고리는 유저,관리자만
        .antMatchers("/admin/**").hasAnyRole("ADMIN") //관리자폴더는 관리자만
        .antMatchers("/").permitAll() //누구나 접근
            .and()
                .formLogin().loginPage("/login") // 인증 로그인 페이지
            .and()
                .logout().logoutSuccessUrl("/")	// 로그아웃 후 홈으로 이동
            .and()
                .exceptionHandling().accessDeniedPage("/"); //예외 발생시 홈으로 이동
}
로그인 페이지로 이동
.formLogin().loginPage("/login")
로그아웃 성공시 이동할 주소 정하기
.logout().logoutSuccessUrl("")
예외 발생시 이동할 주소 정하기
.exceptionHandling().accessDeniedPage("");
로그인 없이 상품 카테고리 누르면 로그인창 뜸 ▶ 권한 제한
유저로 로그인 후 관리자 페이지(http://localhost:8080/admin/pages) 로 이동하면 메인홈으로 이동 됨 ▶ 예외 발생
nav바에 로그인 가입하기 버튼 / 로그아웃 버튼 표시
[ Common ] 에 추가하여 전체 적용하기
@ModelAttribute
public void sharedData(Model model,HttpSession session,Principal principal) {
if(principal != null) { //인증된상태
model.addAttribute("principal", principal.getName()); //유저네임을 전달
}
Principal : 사용자 정보
: Spring Security 에서는 이러한 인증, 인가를 위해
Principal 을 아이디, Credential 을 비밀번호로 사용하는 Credential 기반의 인증 방식을 사용한다.
principal.getName() 붙여서 유저네임을 전달가능
[ nav.html ]
1. 고객용 페이지 부분에 추가하기
- 로그인 인증정보가 없다면 로그인/가입하기 버튼이 표시
<ul class="navbar-nav" th:if="${principal == null}">
<li class="nav-item active">
<a class="block px-3 nav-link" th:href="@{/register}" th:text="가입하기"></a>
</li>
<li class="nav-item active">
<a class="block px-3 nav-link" th:href="@{/login}" th:text="로그인"></a>
</li>
</ul>
※ px-3 : 간격
※ th:href="@{/login}" th:href="@{'/login'}" 안에 작은 따옴표를 넣거나 안넣거나 상관없음
- 로그인 인증정보가 있다면 로그아웃 버튼이 표시되도록
<form th:if="${ principal != null}" th:action="@{/logout}" method="post">
<span style="color: #FF6840;" th:text="${'환영해요!, ' + principal}"></span>
<button class="btn btn-secondary ml-2">로그아웃</button>
</form>

2. 관리자용 페이지 부분에 추가하기
<form th:if="${principal != null}" th:action="@{/logout}" method="post">
<span class="text-primary" th:text="${'[관리자 모드], ' + principal}"></span>
<button class="btn btn-secondary ml-2">로그아웃</button>
</form>
<div class="collapse navbar-collapse" id="navbarNav">
    <ul class="navbar-nav mr-auto">
      <li class="nav-item active">
        <a class="nav-link" th:href="@{/}">Home</a>
      </li>
      <li class="nav-item active">
        <a class="nav-link" th:href="@{/admin/pages}">Page</a>
      </li>
      <li class="nav-item active">
        <a class="nav-link" th:href="@{/admin/categories}">Category</a>
      </li>
      <li class="nav-item active">
        <a class="nav-link" th:href="@{/admin/products}">Product</a>
      </li>
    </ul>
    <form th:if="${principal != null}" th:action="@{/logout}" method="post">
      <span class="text-primary" th:text="${'[관리자 모드], ' + principal}"></span>
      <button class="btn btn-secondary ml-2">로그아웃</button>
    </form>
</div>
※ <ul class="navbar-nav mr-auto"> : mr-auto를 넣어야 form이 맨 오른쪽 위치로 감

반응형
LIST
'Spring boot | 쇼핑몰 만들기 | 어글리 마켓 > security | 로그인' 카테고리의 다른 글
| Spring Boot | AJAX에 csrf 적용방법 (0) | 2022.05.13 |
|---|---|
| 인증(유저,관리자) 하는 클래스 UserDetailsServiceImpl (0) | 2022.05.12 |
| 가입하는 컨트롤러 RegistrationController (0) | 2022.05.12 |
| Entity User, Admin 클래스 생성 (0) | 2022.05.12 |
| 스프링 시큐리티 적용하기 | 유저,관리자 테이블 생성 (0) | 2022.05.12 |